
Related Article


.png)
.png)


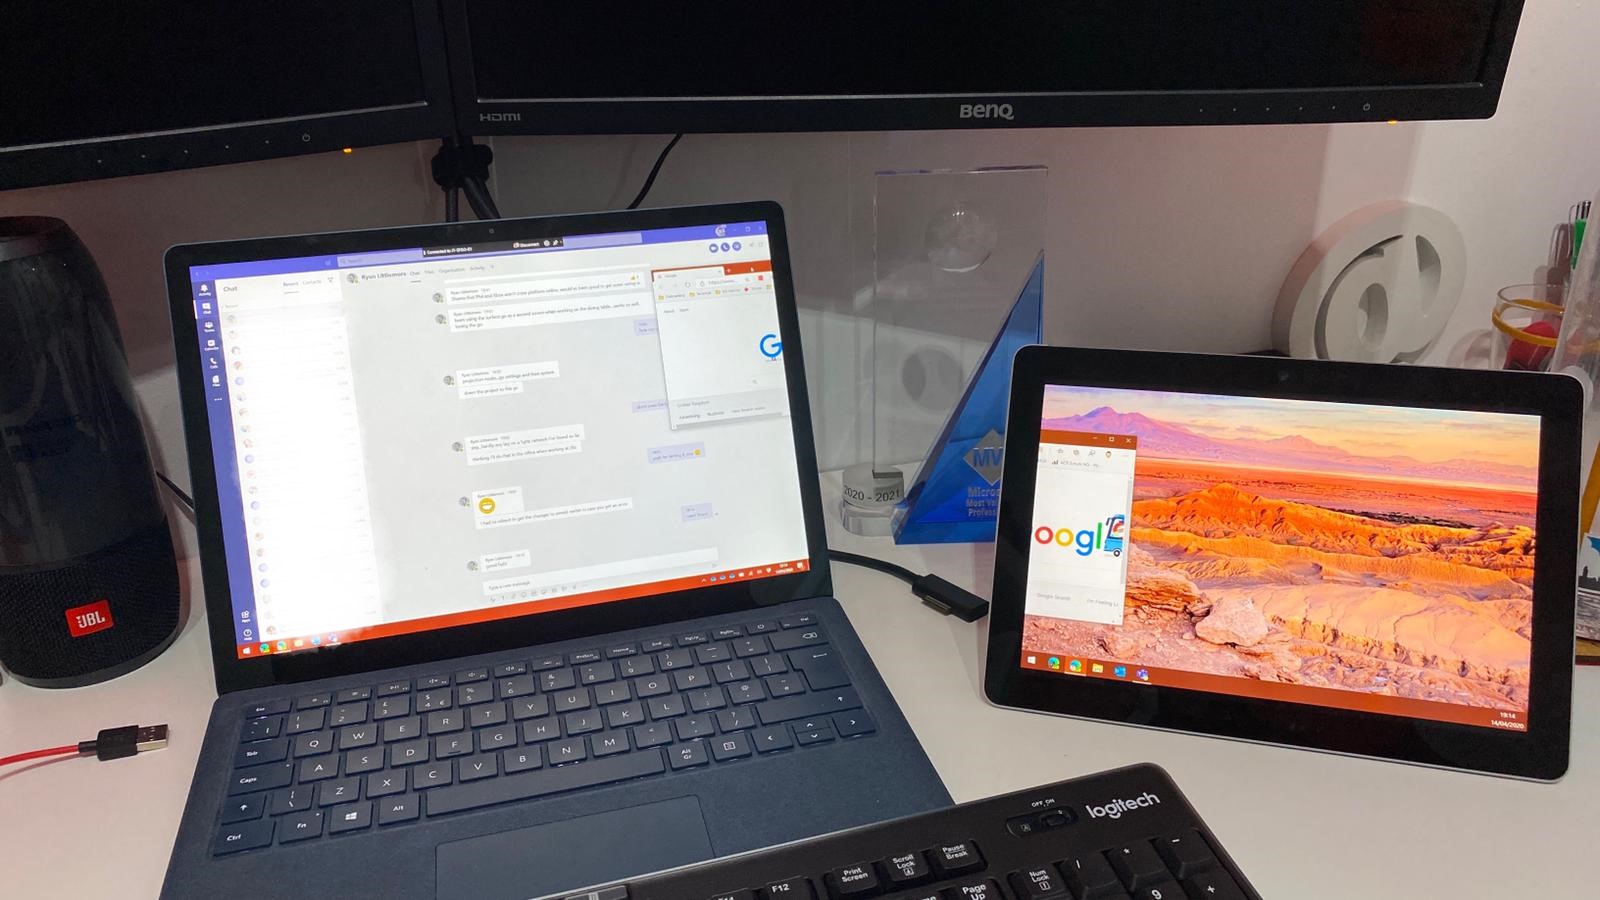
How to use a Surface or laptop as a second monitor.
Working or schooling from home often means you'll need a second monitor experience. It helps you see more of your open windows and apps and can help improve your productivity. However, a second monitor can be quite expensive, with some ranging from $80, all the way up to $200 and beyond.
That said, did you know that if you have a spare laptop or Surface, you can use its screen as a dedicated monitor via Wi-Fi thanks to Miracast? You even can use its keyboard and mouse to control your main PC, too. Today, we'll look at how you can do that.
Before getting started, there's a couple of things to note. First off, it's important to mention that using a laptop or a Surface as a second monitor for your main PC requires Wi-Fi, as the connections will happen through a network. Make sure both PCs are on the same Wi-Fi network, too, as they'll need to share data with each other.
Secondly, your PC will also need to be running the Windows 10 Anniversary Update or newer. This is because you need to check to see if your PC supports the Miracast protocol. Most modern PCs support it, and this shouldn't be an issue.
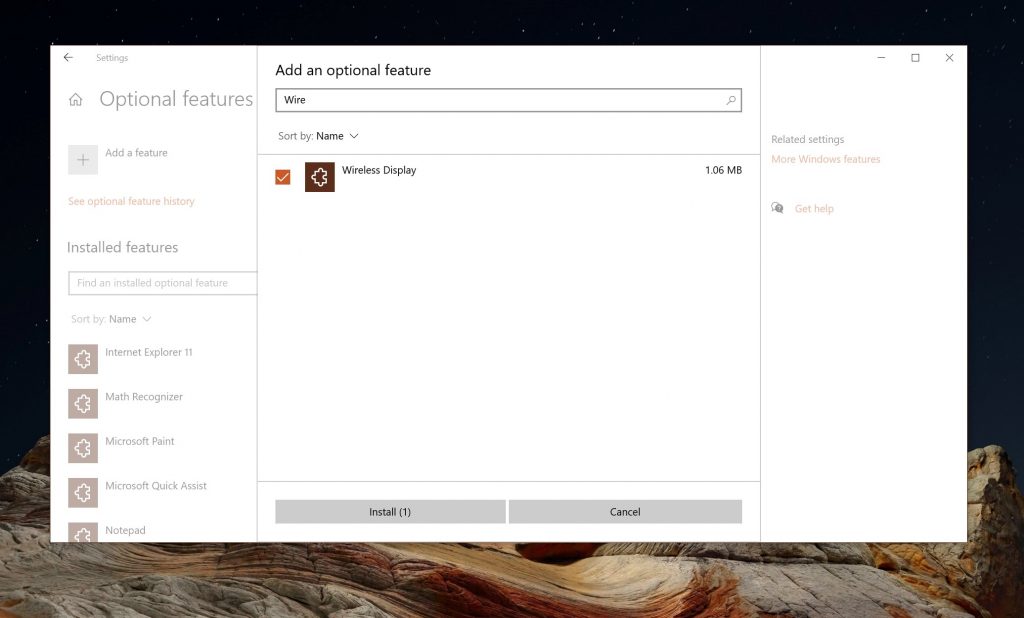
We also want to note that, on some Windows editions, you might need to install an optional feature to get started. You'll need to do this on both the host PC, and the guest PC --- otherwise known as the one you're protecting to, and the one you're projecting from.
To begin, on both PCs, search in the Windows 10 settings for Projection Settings. If the settings are all grayed out, you'll need to install the Optional Features and add the Wireless Display optional feature. To do this, click Optional Features and then click Add a feature. Search for Wireless Display and then choose the check box, and click Install. Windows 10 will install the feature in a few minutes and you can go back to see if the feature is there.
That done, now you can actually configure your PCs for wireless casting. Follow and configure these settings on both the host PC (your main PC) and also the Surface (or second laptop or PC) you'll be projecting to use as a monitor.
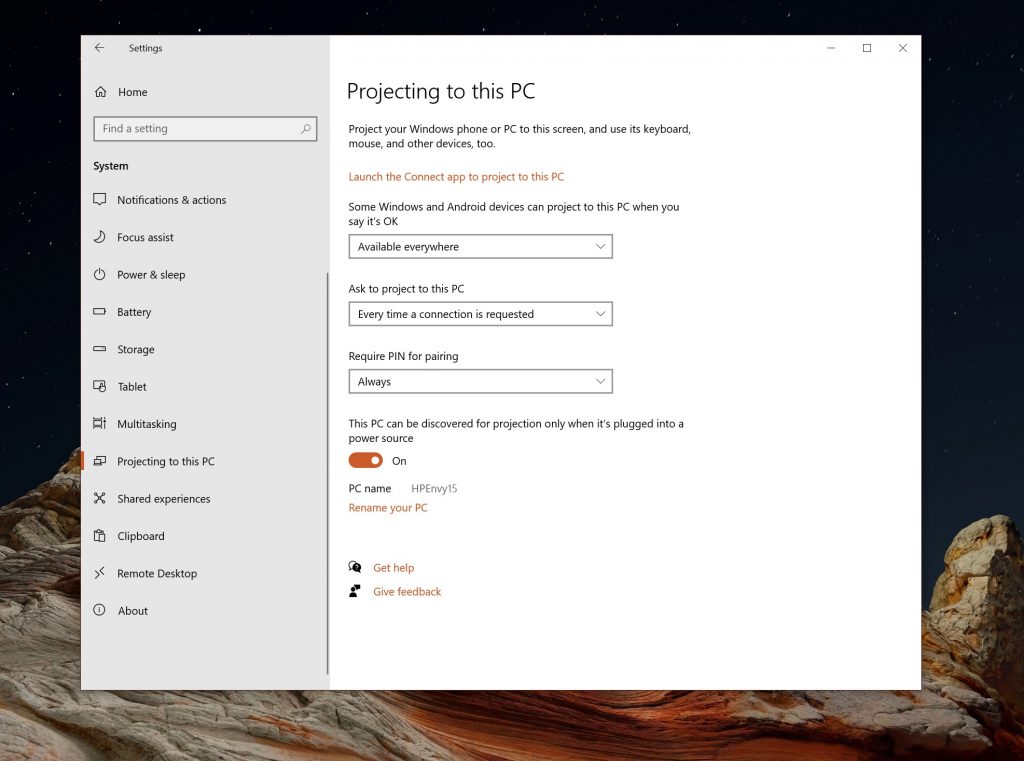
Open Settings, click on System, and then choose Projecting to this PC. From there, look at the drop-down menus for Some Windows and Android devices can project to this PC. You can either choose Available everywhere or Available everywhere on secure networks. We suggest choosing Available everywhere as it is the easiest. However, if you're conscious about security, you can choose the second option to ensure a safe connection.
In the second drop-down box for Ask to project to this PC, we also suggest you use Every time a connection is required. This is the most secure. You'll also want to make sure that you have Always selected under Require a PIN for pairing so that the connections between both PCs are secure. If you prefer a faster pairing method, though, you can disable this.
Finally, in the last box, be sure to choose the toggle switch to Off. This makes it so that you use the second PC as a portable display on the go (away from power, while on battery.) You can toggle the switch to On if you prefer to use power only and conserve battery life.
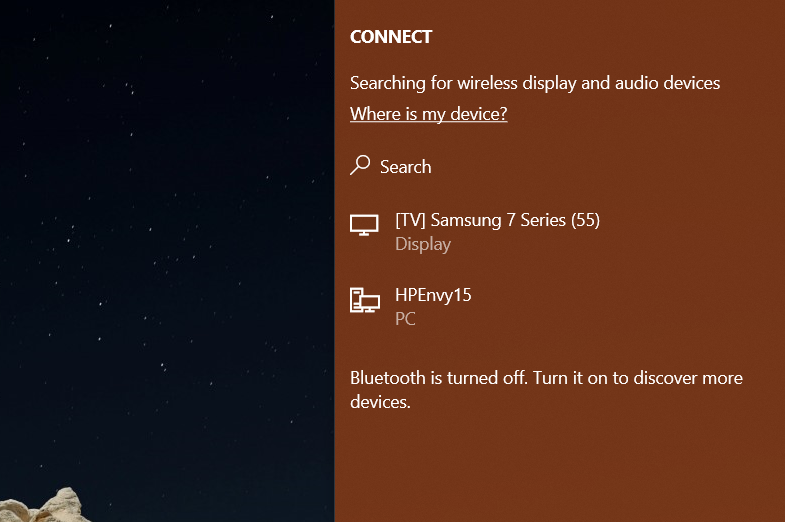
With all the settings configured, you can now connect your main PC to your Surface or your second laptop or PC as a monitor. Hit the Windows Key and the P key on your main PC. This will open up the projection options. Choose Extend from the list
You should see an option for Connect to a Wireless display. Be sure to choose this and then look for the name of your PC or your Surface that you're using as a second monitor. Click it, and then on the pop-up prompt on your second PC, laptop, or Surface, choose Always Allow and then OK to allow your Surface or Second PC to connect to the main one.
You'll then need to go back to your Surface or second PC, and choose Always Allow in the prompt at the bottom of your screen, and then click OK. Finally, back on your main PC, enter the PIN on the screen that you see on your Surface or second PC or laptop. Once you click enter, you'll then see that your Surface is now mirroring your main PC.
You can then change the settings as you'd like. Simply hit the Windows Key and P on your main PC, and then choose Connect to a Wireless display once more. Then, choose Change Projection Mode. You can switch it so your Surface is an extended display, rather than the mirrored display, just choose Extend from the list.
If you like, you also can choose Allow mouse, keyboard, and input from this device so you can use your Surface's touch screen to drag around windows, etc. You can then head into Display Settings on your main PC to drag around the displays and change the order of the displays so it fits how things are situated on your desk.
Do note that there are some additional settings you can configure for projection. On your main PC, click the settings icon next to the Disconnect button at the top middle of your screen. You can choose how you are projecting. You can choose Gaming, Working or Watching Videos. This will change the latency and the stream settings to ensure optional quality.
When you're done using your Surface or laptop or secondary PC as a display, you can disconnect. Simply hit the Windows Key and P controls on your keyboard. Then, choose Connect to a Wireless display. From there, choose Disconnect. And your session will be disconnected.
That's the article about Screen mirroring and projecting to your Surface. Hope this article helps!
If you have problems like those mentioned above, don't worry! Zapplerepair is here to solve problems with your device. If you have any questions, please contact us at 021-26081043 (Office) or +65-83888781 via WhatsApp or through our other social media. You can also visit our nearest branch in your city. See you in the next article!